Auto-layout in Lion
In my previous post (part 1 and part 2), I talked about new Lion feature - view-based table views. I skimmed over auto layout briefly. In this post, I’m going to talk about it a bit more. We’ll update the example app from previous post to use auto layout and see what changes are required when porting existing code. In addition, we’ll take a look at how we can use auto layout with view controllers and dynamic view hierarchies.
Note that this post assumes you have basic knowledge about auto-layout system. You’re strongly encouraged to check Cocoa Autolayout WWDC 2011 video and/or read Apple’s Cocoa Auto Layout Guide.
Porting existing code
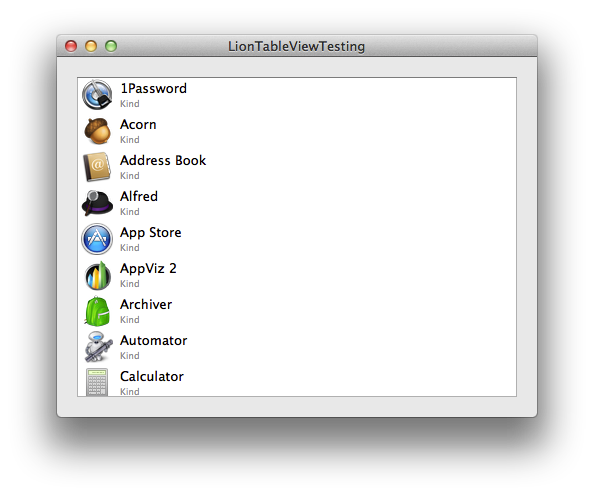
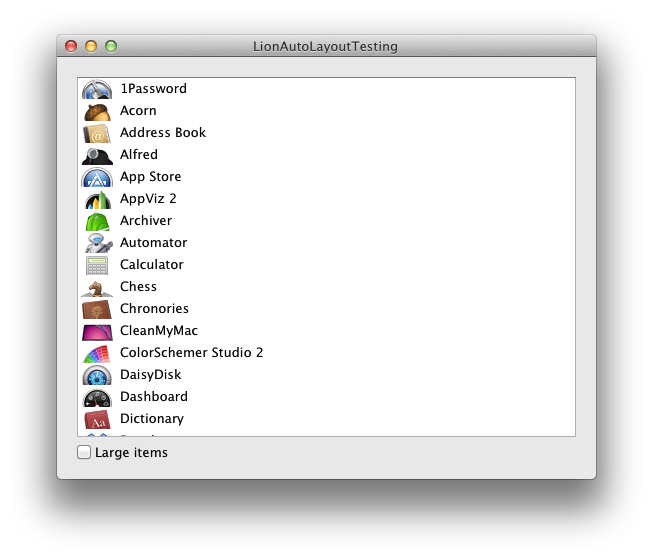
I’ll use example 5 from previous post as a starting point. A quick refresher - the app shows a list of files in your /Applications folder in a view-based table view and looks like this:
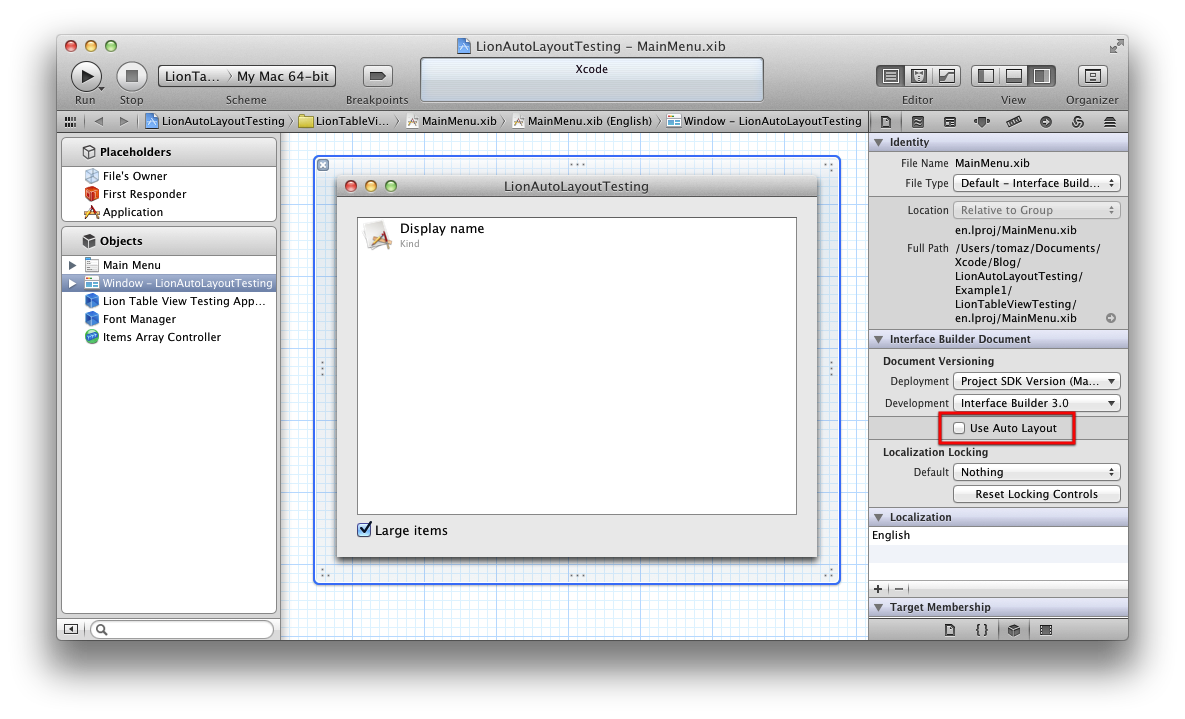
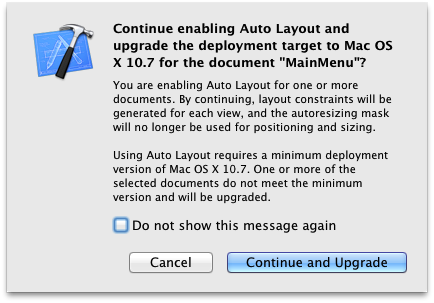
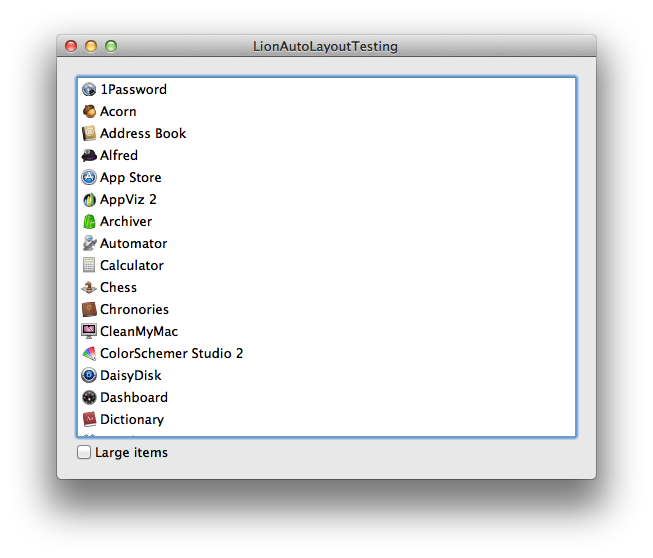
Let’s get our hands dirty: we must first enable auto layout and it’s per-xib option. This means you can gradually convert your app one xib at a time, which is a nice touch! The setting is available in file inspector, so open your xib file (MainMenu.xib in our example), and enable Use Auto Layout checkbox. Xcode will warn you about upgrading the file and eagerly perform its duty upon confirmation:
And then you end up ….. looking at the same window as a moment ago - visually nothing has changed, but behind the scenes, Xcode has converted all autosizing masks to auto-layout. All controls remained in their previous place and behave the same way in running application as before.
This is probably a good time to spend few words about auto-layout system and how it’s different to autosizing masks. Auto-layout is constraints based system. This means you describe constraints for each view, for example the position on the screen or how it scales and moves when user resizes windows. In fact, if you’re used to Core Animation’s CAConstraint, you’ll feel right at home. As opposed to autosizing masks which were handled as integer flags you would bitwise-or on a view to get desired effect, each auto-layout constraint is represented as a real Objective-C object - NSLayoutConstraint instances to be precise. They are serialized to the nib file the same way as views, controllers and the rest of the objects!
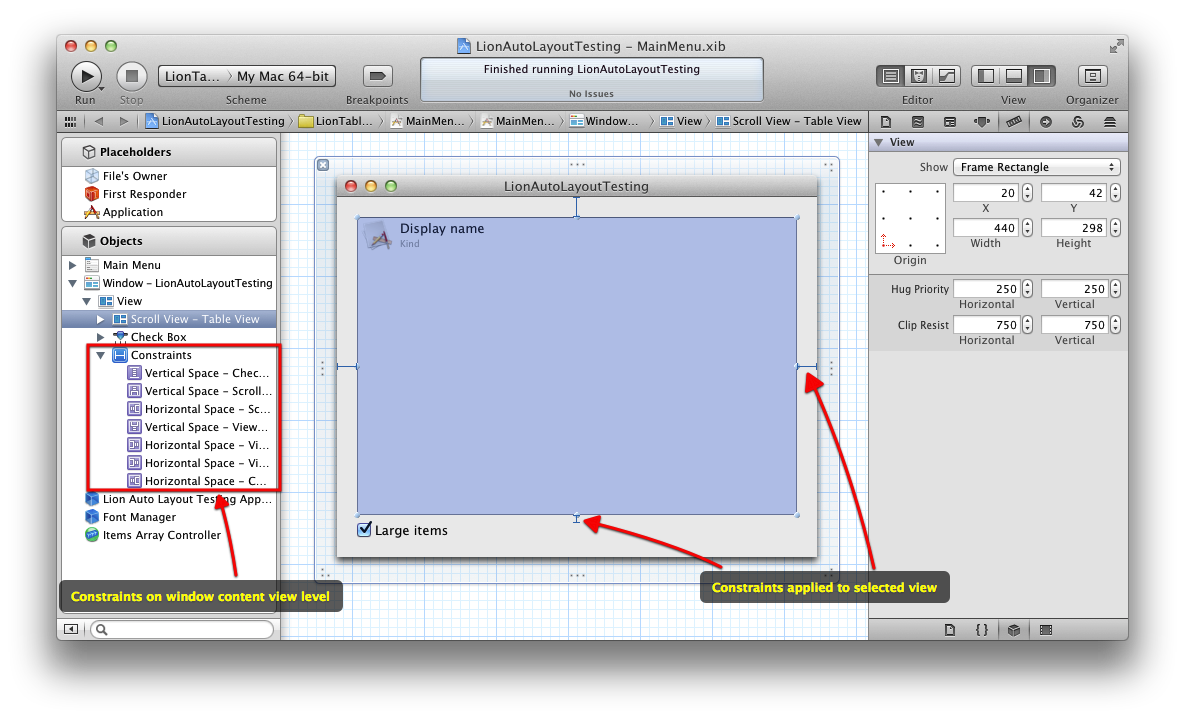
Let’s examine the nib file to notice the differences. First of all: size inspector no longer shows autosizing mask controls. Selected controls, our table view for example, will show their associated auto-layout constraints - in our case 4 constraints fixing the table to each edge of the window. Furthermore, you can select constraints and change their settings in attributes inspector! Finally, you can see all applied constraints on a certain level in objects hierarchy. Here are some screenshots:
Well, as obviously everything works, we’re done! Or so we think - when
changing row height through the checkbox, we notice the table doesn’t
properly resize it’s contents. Details label is properly faded, but only
visible icon sizes and label positions are changed and even then, their
new setting doesn’t persist when scrolling them out and back it. Looking
at code, there’s quite a bit of hard-coded stuff for handling this in
ItemCellViews layoutViewsForLargeSize:animated: method. This is
clearly fighting with layout system, so we should remedy it.
Replacing hard coded sizing code
First of all, let’s remove all custom resizing code from the method, so we end up with this:
- (void)layoutViewsForLargeSize:(BOOL)largeSize animated:(BOOL)animated {
    kLargeSizeRequested = largeSize;
    CGFloat detailAlpha = largeSize ? 1.0f : 0.0f;
    if (animated) {
        [[self.detailTextField animator] setAlphaValue:detailAlpha];
    } else {
        [self.detailTextField setAlphaValue:detailAlpha];
    }
}
We still need to handle detail view alpha, but apart from this, all the ugly resizing code is gone - it’s now handled by auto-layout system! Running the project now properly changes the settings and they persist with scrolling, but icons are not properly resized in small mode:
Did Xcode fail to update the xib with auto-layout? Short answer is no - it actually did a pretty good job. Just think of how we setup the icon view: we specifically set it’s width and height to 32 pixels and that’s exactly what constraints created by Xcode do, regardless of superview changes. So we need to change the constraints, and after thinking over it a bit, here are the list of desires:
- Our cells control sizes should not have hard-coded width/height values
- We ideally want to change the height of rows in only a single place and have children adapt automatically
Reading auto-layout documentation, this should certainly be possible. Encouraged, I opened my xib file in IB and start moving and testing various layouts, but it turned out it’s quite difficult to get desired results. While IB is very good for positioning main window controls with large gaps between them, I didn’t find a way I could control fine, per-pixel so to speak, positioning of views. Similar, I couldn’t setup constraints of one view to match another one. After playing with it for an hour or so, I finally gave up and decided to create constraints in code. And this is what we’ll do here too - it’s perfect for getting to know the APIs hand in hand, plus it’s nice introduction to what we’ll be doing on in next chapters.
Coding NSLayoutConstraint rules
So first we need to find a class we’ll stick the rules into. As we
already have NSTableCellView subclass, and constraints should be added
to a superview of controls we want to position, it seems like a perfect
candidate. So open IconCellView.m file and let’s get started. But in
which method should we put the code? We only want to apply the rules
after the view and all of it’s subviews which we’ll be positioning are
created. After thinking about how it works, awakeFromNib seems like a
good candidate to start with - it gets sent after all controls were
deserialized and linked, and if we have issues with table view reusing
cached cells, we’ll adapt later on. So let’s create the method and write
constraints that will satisfy above rules. But before adding, we should
probably remove all the constraints IB has created, otherwise we’ll
probably soon hit trouble. So here’s our boilerplate method:
- (void)awakeFromNib {
    [self removeConstraints:self.constraints];
    ...
}
Running the example app would end with all controls overlapping at the bottom-left edge of table rows, but that’s even better that I’d expect as we’re not using any layout.
Constraining icon view
Let’s first fix the icon view:
- It should be linked to left, top and bottom cell view edge by 2 pixels.
- Height should dynamically adapt to cell view height.
- We should make the width linked to height.
This should make it fit any size of cell view without having to specify actual size:
[self addConstraints:[NSLayoutConstraint
    constraintsWithVisualFormat:@"|-2-[iconView]"
    options:0 metrics:nil views:views]];
[self addConstraints:[NSLayoutConstraint
    constraintsWithVisualFormat:@"V:|-2-[iconView]-2-|"
    options:0 metrics:nil views:views]];
What’s with those funny looking strings in there!? It’s the language in which you can describe constraints. Basically the first line is saying: position our icon view 2 pixels from it’s superview left edge. And the second: position our icon view vertically so that it’s top edge will be 2 pixels below it’s superview top edge and bottom one 2 pixels above superview bottom. You can read more about the language in above mentioned Cocoa Auto Layout Guide, it’s clear and concise, so I would only be repeating it here. Here’s also direct link to the subsection describing visual format language rules for convenience.
Oh - views variable in the example is a NSDictionary containing our
views. Here’s how you can create it:
NSView *iconView = self.imageView;
NSDictionary *views = NSDictionaryOfVariableBindings(iconView);
NSDictionaryOfVariableBindings is a helper macro that will turn a
variable list of objects into a NSDictionary with keys corresponding
to vars passed to it. So this code would do the same:
NSDictionary *views = [NSDictionary
    dictionaryWithObject:iconView
    forKey:@"iconView"];
Note that we can’t use self.imageView on NSDictionaryOfVariableBindings!
So running the app now doesn’t seem to do much by itself, but changing the size checkbox, the icon automagically resizes to fit the new height. But it seems there are issues - the icon doesn’t stay at the left edge as we’ve instructed. After testing for a while it turns out it’s normal: the code above only resizes vertical size, while width remains at the size set in IB - 32 pixels. Let’s add constraint that will tie width with the height. But how to express this in visual format language? Turns out it’s not possible, so we have to resort to “manual” description:
[self addConstraint:[NSLayoutConstraint
    constraintWithItem:iconView
    attribute:NSLayoutAttributeWidth
    relatedBy:NSLayoutRelationEqual
    toItem:iconView
    attribute:NSLayoutAttributeHeight
    multiplier:1.0f constant:0.0f]];
Quite a bit more verbose, but it’s pretty straightforward. You can
actually read it like this “constrain iconView’s width to be equal to
iconView’s height”. Again, for more details, go read Cocoa Auto Layout
Guide and documentation for method
constraintWithItem:attribute:relatedBy:toItem:attribute:multiplier:constant:.
Constraining name and details text fields
Let’s go on and setup the text fields. First name field checklist:
- Left edge should be linked to icon right edge with few pixels gap.
- Right edge should be linked to right side of cell view.
- Perhaps we should update vertical position a bit to better fit both sizes.
This should result in label moving with the icon as it gets smaller/larger and occupying as much horizontal space as possible when resizing the window. And detail text field:
- We should tie its left position and width to name field.
- Vertically it should be placed few pixels below name field.
And here’s the code:
// name label
[self addConstraints:[NSLayoutConstraint
    constraintsWithVisualFormat:@"[iconView]-4-[nameView]-2-|"
    options:0 metrics:nil views:views]];
[self addConstraints:[NSLayoutConstraint
    constraintsWithVisualFormat:@"V:|-1-[nameView]"
    options:0 metrics:nil views:views]];

// detail label
[self addConstraints:[NSLayoutConstraint
    constraintsWithVisualFormat:@"V:[detailView]-5-|"
    options:0 metrics:nil views:views]];
[self addConstraint:[NSLayoutConstraint
    constraintWithItem:detailView
    attribute:NSLayoutAttributeLeft
    relatedBy:NSLayoutRelationEqual
    toItem:nameView
    attribute:NSLayoutAttributeLeft
    multiplier:1.0f constant:0.0f]];
[self addConstraint:[NSLayoutConstraint
    constraintWithItem:detailView
    attribute:NSLayoutAttributeWidth
    relatedBy:NSLayoutRelationEqual
    toItem:nameView
    attribute:NSLayoutAttributeWidth
    multiplier:1.0f constant:0.0f]];
You should be able to read through the code, but basically we’re
connecting name view to the right of the icon view, separated by 4
pixels all the way to the right edge of the cell view with 2 pixels
offset. Vertically we’re connecting it to 1 pixel below the top of the
cell view. For detail label, we’re first setting it to 5 pixels above
bottom edge of cell view, then we simply tie it’s left coordinate and
width to name field. Of course, we also needed to add nameView and
detailView to views dictionary.
Running the app now results in smoothly animated transitions between large and small sizes:
Check Example1 for complete code. You might want to compare it with Example5 of previous post which to see the difference between hard-coded and layout based approaches.
Dynamic views with auto-layout
Up until now we’ve been looking at static UI, how about modern
single-window applications driven by view controllers? For this example
we’ll create a view handled by NSViewController subclass and
dynamically add it to a placeholder view in a window. This is typical
situation in single window apps nowadays. Let’s see how we can tackle
this situation.
In pre-auto-layout world, I usually setup placeholders in their parent view/window in IB so I get an idea of how actual views will fit to the rest of UI. I also make them auto-resize with the rest of UI (if applicable). I always design concrete subviews to be as adaptable to changes in size as possible, therefore I make them auto-resize with their parent. And of course, I setup their initial frame to the bounds of the placeholder view at the time I add them to view hierarchy. Afterwards, the views adapt automatically to users resizing windows. This seems like a good starting point for auto-layout as well.
Let’s start with a new non-document-based Cocoa Application. This should
result in an empty window when run. First we’ll add a placeholder view
to the window - we could use window’s contentView, but using a
placeholder also demonstrates how we can use layout to setup the sizes
in IB. First of all don’t forget to enable auto-layout for xib file -
Xcode templates disable it by default! Then drag a custom view from
objects library and position it to the window. Make it resizable with
window, so that we can verify our constraints later on - for this
example, I chose to keep the view attached to all four sides using
standard spaces:

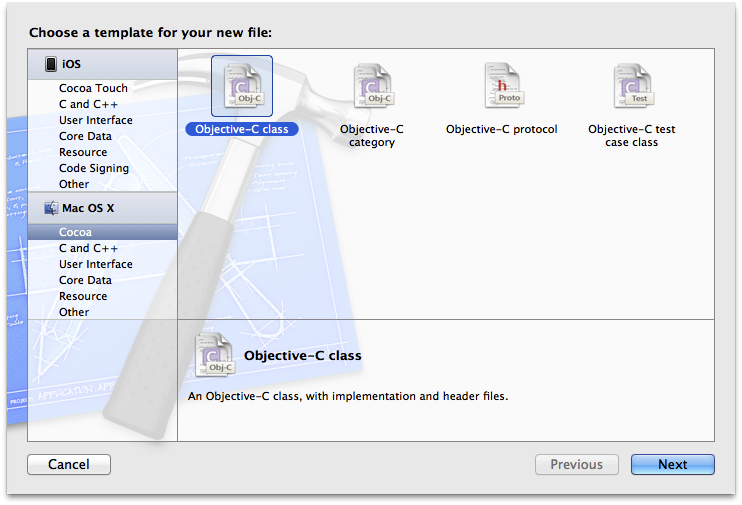
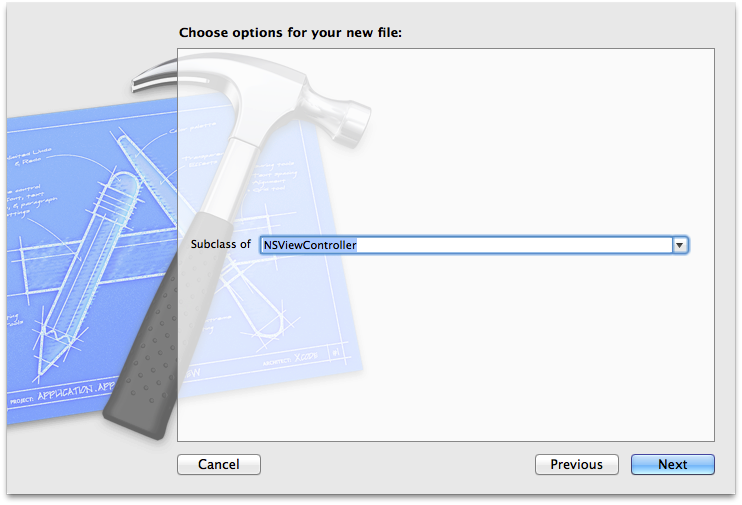
Next, create a new file through menu File > New > New File… Choose Mac OS X, Cocoa, Objective-C class on the first page, then choose NSViewController as the subclass on the next and type your name on the final step - I chose MyViewController:
Now open MyViewController.xib file, enable auto layout and drag some objects on the view. I chose to use four buttons which I placed to all four corners. I also made parent view smaller, so that we can be sure it’ll be automatically fitted when placed in placeholder view on the window:
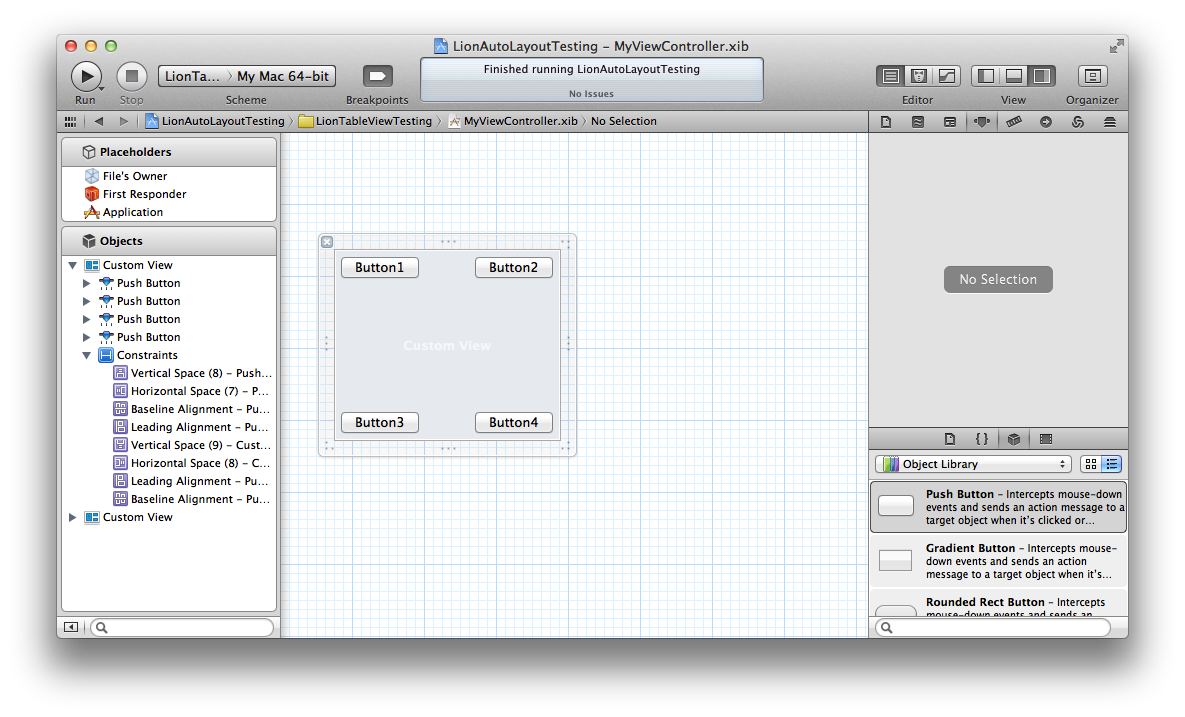
Notice the constraints in the object hierarchy on the left - these tie our buttons to edges of the parent view. You can click on them to see their settings in attributes inspector. But there are no constraints that specify how the main view should fit to the parent view (when placed to one). Actually, it’s not possible to setup auto-layout constraints prior than adding the view to a superview! Hence our view controller is finished for now, let’s add it’s view to the placeholder on the main window after the application finishes launching and handle constraints programmatically then.
To start, we need to get the pointer to our placeholder view through
IBOutlet so that we can add concrete views to it - create the property
in the app delegate and connect it in IB. Then we can use it to add our
concrete view to it:
- (void)applicationDidFinishLaunching:(NSNotification *)note {
    NSView *placeholderView = self.placeholderView;
    NSView *realView = self.myViewController.view;
    NSDictionary *views = NSDictionaryOfVariableBindings(realView);

    [realView setTranslatesAutoresizingMaskIntoConstraints:NO];
    [placeholderView addSubview:realView];

    [placeholderView addConstraints:[NSLayoutConstraint
        constraintsWithVisualFormat:@"|[realView(>=190)]|"
        options:0 metrics:nil views:views]];
    [placeholderView addConstraints:[NSLayoutConstraint
        constraintsWithVisualFormat:@"V:|[realView(>=80)]|"
        options:0 metrics:nil views:views]];
}
First we have to prevent translating autoresizing mask into constraints for the view we’re adding - this is crucial or our constraints won’t work - it took me some time to figure this out as the flag seems to be set automatically when positioning views in IB, but for manual constraints, we need to add it specifically! Then we add the view to placeholder - again, it’s important to first add the subview and only then setup it’s constraints. The constraints themselves are pretty straightforward: we make the subview fit completely the placeholder and even specify minimum size so that the buttons don’t cover up themselves. And that’s it.
Check Example2 for complete code - it’s slightly extended with reusable method you can use to swap views in and out of placeholder. You can try and add second view controller and swap the views out as an exercise.
Perhaps few more points about source code: notice how the view controller is lazily instantiated - I try to use this pattern in as many places as possible. Hence the app loads and instantiates only what it actually needs, resulting in faster startup. Another thing I usually do is provide convenience class method for initializing controller with it’s designated nib - I always felt this is something that should be embedded in view controller subclass and it makes the rest of the code cleaner too.
Conclusion
Auto-layout really brings user interface layout to higher level. As we’ve seen we could get rid of the whole bunch of ugly code with hard coded constants to nicely expressed relations between views. As additional bonus, auto-layout views adapt to UI changes due to localization much more easily. And in most cases, all you have to do is enable it through a single check box in IB and let Xcode do most of the work for you. And for those cases where you have to resort to code, it does tend to be verbose, but it’s clear and much more understandable than setting up NSPoints and NSFrames. My only complaint is they are hard to setup in IB for fine level positioning, they tend to switch between dynamic/static width as you drag views around. But in those cases, you can use manual constraints in code. If you’re targeting Lion, you should definitely check it out, it’ll make your life a lot easier!